The Compressor Bible: Every Parameter, Every Classic Unit, No BS
By Minta Foundry Team
March 27, 2026
•
15 minute read
If you've ever stared at a compressor plugin and thought "I know what these knobs do... sort of," this one's for you. We're going to break down every single parameter on a compressor — not what the manual says, but what's actually happening to your audio, why it matters musically, and how to actually use each parameter to make better mix decisions. We'll also look at how classic hardware units handle these parameters differently, because understanding why an LA-2A plugin sounds nothing like an 1176 plugin starts with understanding the circuits they're modeling.
Every signal tells a story. Compression shapes how it's heard.
The Core Parameters
Threshold
The threshold is the level above which the compressor starts working. Everything below it passes through untouched. Everything above gets compressed according to the ratio.
The sidechain circuit constantly monitors the signal level. The moment it crosses the threshold, a control voltage is generated that drives the gain-reduction element — whether that's modeled after a VCA chip, a FET transistor, a vacuum tube, or an optical cell.
→ A high threshold around –10 dBFS means only the loudest moments get compressed. A vocal that's mostly controlled but has a few loud phrases — set the threshold to catch just those peaks. Start here and pull it down gradually while watching the gain reduction meter until you see 2–4 dB of reduction on the loudest parts.
→ A low threshold around –30 dBFS means most of the signal is being compressed. That "in your face" vocal sound where every syllable sits at the same level. Use this with low ratios for leveling, or high ratios for effect.
One of the most common mistakes is setting the threshold too low and getting 10+ dB of constant gain reduction. The dynamics are gone, the performance sounds flat, and no amount of makeup gain brings the life back.
Some plugins don't have a threshold knob at all. If you've opened an 1176-style plugin and wondered where it is, the Input control pushes more signal into a fixed internal threshold — turn it up and you're compressing harder. LA-2A plugins work similarly. The Peak Reduction knob sets the amount of gain reduction directly. Understanding this is key to using these plugins effectively.
Ratio
Ratio defines the relationship between input level and output level for signal above the threshold. At 4:1, for every 4 dB the signal goes over the threshold, only 1 dB comes out the other side.
1.5:1 to 2:1 — Gentle leveling. You'd have to listen carefully to hear this working. Great for mix bus, acoustic instruments, or anything where you want things to sit a little more evenly.
3:1 to 4:1 — The workhorse range. Vocals, bass, drums. This is where most general-purpose compression lives. If you're unsure, start at 3:1.
8:1 to 10:1 — Heavy compression. You can hear this working. Use it intentionally for parallel drum compression, aggressive vocal effects, or taming a wildly dynamic bass.
20:1 to ∞:1 — Limiter territory. The signal effectively cannot exceed the threshold. Used for peak protection and brick-wall limiting in mastering.
Ratio and threshold interact more than most people realize. A low ratio at a low threshold can produce more gain reduction than a high ratio at a high threshold. 2:1 at –40 dB might compress more aggressively than 8:1 at –5 dB. Always watch the gain reduction meter, not just the ratio number.
1176-style plugins give you fixed ratio buttons at 4:1, 8:1, 12:1, and 20:1. The "all buttons in" mode makes the ratio fluctuate dynamically between roughly 12:1 and 20:1, with the attack and release curves warping unpredictably. This was never designed — it was a hardware accident that became one of the most famous sounds in recording. Try it on drum room mics.
Fairchild and vari-mu style plugins have a ratio that isn't fixed. It increases with signal level. Quiet signals barely get touched while loud signals hit near-limiting. This is why these plugins feel so smooth and forgiving on mix bus even at aggressive settings.
The Time Controls
Attack
Attack time is how long it takes the compressor to reach its full gain reduction after the signal exceeds the threshold. During the attack phase, the initial transient passes through with less compression. This is the single most important parameter for shaping the punch and character of your sound.
→ A slow attack of 10–30 ms on drums lets the stick hitting the head pass through before the compressor clamps down. You keep the punch and snap while controlling the sustain and ring. Start at 20 ms and adjust from there.
→ A fast attack under 1 ms on drums catches and squashes the transient itself. Drums sound rounder and fatter, but noticeably less punchy. Useful when a snare is too aggressive, but dangerous as a default.
→ A medium attack of 5–10 ms on vocals lets natural consonants and vocal onsets through while controlling the sustained loud parts. The vocal sits in the mix without sounding compressed. This is your starting point for vocal compression.
The single most common compression mistake is setting the attack too fast and killing transients. Producers dial in fast attack times thinking more compression equals better, without realizing they're destroying the very thing that gives instruments punch, definition, and life. The mix sounds dull, flat, and lifeless — and they blame everything except the attack time.
1176-style plugins have the attack knob labeled 1 through 7, where 7 is the fastest and 1 is the slowest. Fully clockwise means fastest. This is the opposite of what most people expect. At its fastest setting of 20 microseconds, it's one of the fastest compressor models available, which is why it's so easy to accidentally crush transients with these plugins.
LA-2A-style plugins don't let you choose the attack at all. It's fixed at roughly 10 ms and responds to the program material. This is a feature, not a limitation. The optical circuit responds at its own pace, and that pace is why these plugins sound so smooth on vocals.
SSL-style bus compressors give you stepped values at 0.1, 0.3, 1, 3, 10, and 30 ms. On mix bus, 10 or 30 ms is standard because you want the transients to punch through.
Release
Release time is how long the compressor takes to stop compressing after the signal drops below the threshold. Watch the gain-reduction meter in your plugin after a loud hit. The meter swings into compression then recovers back to zero. The speed of that recovery is the release time. If you're not watching this meter while setting release, you're guessing.
→ A fast release on drums means the gain reduction recovers between hits, preserving apparent loudness and energy. The sustain and room sound bloom up after each hit. But set it too fast and you get audible pumping — the noise floor surging up and down.
→ A slow release on vocals gives smooth, consistent leveling. The compressor stays gently engaged through entire phrases. The vocal feels held without sounding squashed.
Release timed to tempo on mix bus is the secret to bus compressor glue. Set the release so the gain-reduction meter returns to zero just before the next downbeat. The mix breathes with the rhythm. Too fast and it pumps. Too slow and it chokes. This takes practice — spend time with the meter.
There are two release mistakes that ruin mixes. The first is setting it too fast, which causes pumping. The compressor clamps and releases audibly on every beat and the noise floor modulates. It sounds like the music is breathing through a straw. The second is setting it too slow, which causes choking. The compressor hasn't released before the next transient arrives, so it's still compressing when the new hit comes. Dynamics get progressively flattened and the track sounds strangled.
Many compressor plugins offer an Auto release mode that uses multiple time constants adapting to the material. Fast recovery for transients, slow recovery for sustained signals. If you're on your mix bus and can't find a release setting that works for the whole song, try Auto. The SSL bus compressor's Auto release is its most popular setting for exactly this reason.
The LA-2A release is genuinely unique. The optical cell recovers about 50% in the first 60 milliseconds, then takes another 0.5 to 5 seconds for the remaining recovery. How long that slow phase takes depends on how long and how hard you were compressing before. A quick loud peak recovers quickly. A sustained loud passage that drives the cell for 10 seconds might take 5+ seconds to fully recover. The optical cell has memory. This is a physical property of the modeled cadmium sulfide crystal, and it's a huge part of why LA-2A plugins sound the way they do.
The Character Controls
Knee
The knee defines how the compressor transitions from not compressing to fully compressing around the threshold.
→ A hard knee is an abrupt switch. Below the threshold nothing happens. Above it, the full ratio kicks in instantly. You can hear exactly when the compressor engages.
→ A soft knee creates a gradual transition over a defined range, typically 6–20 dB centered on the threshold. Compression eases in gently.
Hard knee on drums and percussion for decisive, assertive compression that adds definition
Soft knee on vocals and acoustic instruments for transparent, natural leveling where you don't hear the compressor grabbing
Soft knee on mix bus, always — a hard knee on your master bus will make the compression audible in a bad way
Some plugins don't have a knee control because the knee is built into the circuit they're modeling. LA-2A plugins have a soft knee from the optical circuit. Fairchild plugins have an inherently soft knee from the variable-mu behavior. dbx 160 plugins have a hard knee by design. Understanding this helps you choose the right compressor plugin for the job before you even touch a knob.
Makeup Gain
Makeup gain is a simple volume boost applied after compression. Since compression reduces the level of loud peaks, makeup gain brings the overall level back up. The peaks are reduced, then everything is turned up, effectively raising the quiet parts.
Louder always sounds better to the human ear. So you add compression, crank the makeup gain, and the signal is now louder than before. "This compressor sounds amazing!" No — it's just louder. The compression might be terrible, but you can't tell because louder always wins.
The fix that will change your mixing is to always A/B with level-matched bypass. Turn the output down until the compressed version is the same perceived loudness as the bypassed version. Then decide if the compression is actually improving the sound. This single habit will improve your mixing more than any plugin purchase.
Many plugins offer auto makeup gain. It calculates compensation based on your threshold and ratio settings, not the actual audio. It's a rough starting point, not a precise match. Use it to get in the ballpark, then match by ear.
Detection Mode
Many compressor plugins let you choose between peak and RMS detection. This fundamentally changes how the compressor responds.
Peak detection tracks the instantaneous peak amplitude. It reacts to the absolute loudest moment of every waveform cycle. Fast, aggressive, transient-focused.
RMS detection computes the average power over a short window. It responds to sustained energy rather than individual peaks. Smoother, more musical, loudness-focused.
Peak on drums to catch every transient with precision
RMS on vocals for smoother, more natural leveling that ignores individual plosives and consonants
RMS on mix bus so compression responds to the overall energy rather than chasing individual transients
1176 plugins are peak detectors, which is why they grab transients so aggressively. LA-2A plugins behave more like RMS detectors because the optical circuit responds to average energy. SSL bus compressor plugins use peak detection for tight transient control. Knowing this helps you pick the right tool before reaching for any knob.
The Routing Controls
Sidechain
The sidechain is the detection circuit — the part of the compressor that hears the signal and decides when to compress. Every compressor has one. Learning to control it is one of the biggest level-ups in mixing.
Many compressor plugins include a high-pass filter in the sidechain. This doesn't filter your audio. It filters what the compressor hears. A sidechain HPF at 100–200 Hz prevents kick drums and bass rumble from triggering excessive compression on a bus. Without it, every kick hit causes the entire mix to duck. With it, the compressor responds to snare hits, vocal peaks, and midrange content instead. If your mix bus compression sounds pumpy, enable the sidechain HPF before changing any other setting.
External sidechain opens up essential mixing techniques.
Kick-triggered bass ducking routes the kick to the compressor's sidechain on the bass track. Every kick hit ducks the bass a few dB, then it recovers. The kick punches through clearly without permanent EQ cuts to the bass.
Vocal ducking on reverb returns sidechains the dry vocal to a compressor on the reverb send. Reverb dips when the singer is singing and swells in the gaps.
EDM sidechain pumping uses heavy compression on pads and synths triggered by a kick or ghost kick track, creating the signature rhythmic breathing of dance music.
Mix and Blend
The mix knob blends the dry uncompressed signal with the wet compressed signal. At 100% wet you hear only the compressed version. At 50%, equal parts dry and compressed. This is parallel compression without needing aux sends or duplicate tracks.
You get the consistency and loudness of heavy compression while keeping the dynamics and transients of the original.
Drums at 40–60% wet with heavy compression on the wet signal. The dry signal keeps the punch while the compressed signal brings up the room, sustain, and body. This is the classic New York compression sound.
Vocals at 20–40% wet to preserve the natural performance while adding consistency.
Mix bus at 10–30% wet for subtle glue and density without audible squashing.
Parallel compression changes the effective ratio. The combined signal has a lower effective compression ratio than the wet signal alone. This means you can compress the wet signal much more aggressively than you would normally — 10:1 or even 20:1 is completely fine when you're blending it at 30%.
Stereo Link
In a stereo compressor plugin, stereo link determines whether the left and right channels compress together or independently.
If channels are unlinked and a loud hi-hat panned hard left causes 6 dB of gain reduction on the left but none on the right, the entire stereo image shifts right during that moment. Your mix wanders.
Linked at 100% means both channels always have the same gain reduction. The stereo image stays rock solid. Use this on mix bus.
Unlinked at 0% means each channel responds independently. Occasionally useful on drum overheads or for creative stereo effects, but risky on anything with a defined stereo image.
Mid-Side mode compresses the mid and side signals independently. Compress the mid harder to control vocals, kick, and snare while leaving the sides more dynamic for width and depth. Powerful for mastering.
Lookahead
Lookahead is a parameter found on many plugin compressors and limiters. It advances the sidechain detection by a few milliseconds so the compressor sees transients before they arrive. Even at the absolute fastest attack setting, there's always a tiny overshoot on the leading edge of a transient. Lookahead eliminates this by giving the compressor advance warning.
This matters most in mastering limiters. Nearly all of them use lookahead to achieve transparent peak control. If your limiter plugin has a lookahead setting, it's usually best left on.
Lookahead introduces latency. Your DAW's plugin delay compensation should handle this, but be aware of it in parallel setups or when monitoring through the plugin live.
Analog compressors can't look ahead in time. This is one of the few areas where digital plugins genuinely surpass the hardware they're modeled on.
The Plugin Models
You've got dozens of compressor plugins. They all have threshold, ratio, attack, and release. So why does an LA-2A plugin sound nothing like an 1176 plugin? Because they're modeling different circuit topologies, and the topology determines the character as much as the settings do.
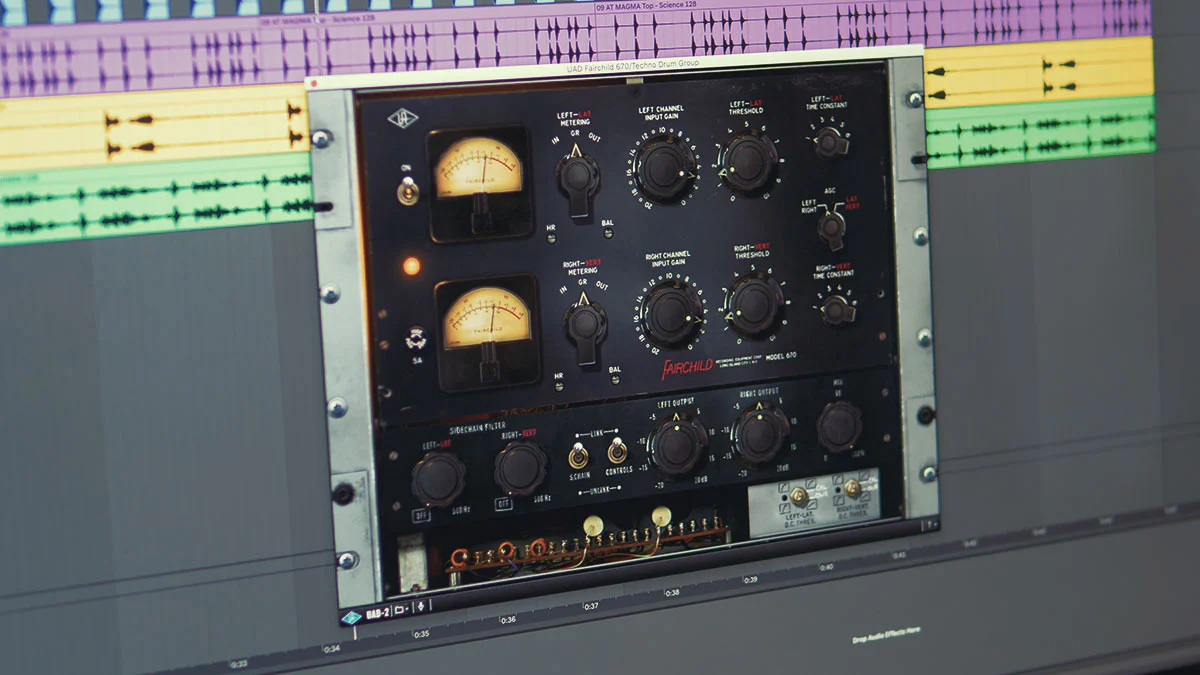
The Fairchild 670 — Minta Foundry's all-time favourite compressor.
VCA — The Transparent Workhorse
→ Plugins modeled on the SSL G-Bus, dbx 160, API 2500, and Neve 33609.
The most precise and transparent topology. Full control over every parameter with the fastest possible attack and release. Adds minimal coloration. The compression itself is the point, not the tone. When you want clean, controlled, predictable compression, reach for a VCA-style plugin. The SSL bus compressor plugin on your mix bus is the quintessential example.
FET — The Aggressive Character
→ Plugins modeled on the 1176 and Purple Audio MC77.
Extremely fast with attack times down to 20 microseconds. Adds harmonic distortion, especially odd harmonics, that increases with gain reduction. This is the bite and excitement that makes 1176 plugins so addictive on drums, vocals, and bass. You hear the compressor working, and it sounds good. When you want energy and aggression, this is your topology.
Optical — The Smooth Operator
→ Plugins modeled on the LA-2A, LA-3A, and Tube-Tech CL 1B.
The modeled light source and photocell can't react instantly. The circuit eases in and out naturally with a two-phase release that creates program-dependent behavior following the performance. This is why LA-2A plugins are the go-to for vocals. Set the Peak Reduction, adjust the Gain, and it just works. When you want transparent, musical leveling, optical is the answer.
Variable-Mu — The Warm Glue
→ Plugins modeled on the Fairchild 670 and Manley Variable Mu.
The modeled vacuum tube circuit creates a ratio that increases with signal level. Gentle on quiet parts, aggressive on loud signals. Multiple modeled tube stages and transformers add harmonic warmth and density. Fairchild plugins are famous for bus compression and mastering because they add tone while controlling dynamics.
Quick Reference
Compressor Plugin Cheat Sheet
LA-2A style — Optical — Best on vocals, bass, acoustic guitar — Smooth, warm, invisible
1176 style — FET — Best on drums, rock vocals, bass — Aggressive, punchy, exciting
SSL G-Bus style — VCA — Best on mix bus, drum bus — Clean, precise, glue
Fairchild style — Vari-mu — Best on mix bus, mastering, vocals — Thick, warm, dense
dbx 160 style — VCA — Best on drums and bass — Immediate, aggressive, punchy
Distressor style — Hybrid — Best on everything, especially drums — Versatile, can emulate all of the above
Five Rules for Better Compression
Listen to the gain-reduction meter. It tells you what the compressor is doing. 2–4 dB of reduction on the loudest peaks is usually plenty. If you're seeing 10+ dB constantly, back off.
Start with the attack. Attack time shapes character more than any other parameter. Get that right, then fine-tune everything else.
Level-match your bypass. Always. The louder-is-better bias will trick you every single time.
Use your ears, not your eyes. If it sounds right, it is right — regardless of what the settings are.
Choose the right plugin model first. An LA-2A plugin and an 1176 plugin will give you fundamentally different results even at similar settings. Pick the topology that matches what you're trying to achieve, then dial in the parameters.